Showing posts with label main course. Show all posts

Monday, July 10, 2017

Herb Butter Salmon and Asparagus Foil Packs


I used parchment paper between the Salmon and the aluminum foil, because BJH was watching me as I prepared this dinner at the lake. Probably always a good idea, though.  I did add extra time, however, because the extra layer kept the salmon and vegetables from cooking very quickly.

I also used broccoli florets instead of asparagus because that is what I had in the fridge.  Now we make the broccoli this way all the time, with or without the salmon! 
"Best broccoli I ever tasted." - CMH

Enjoy

Ingredients

·      4 
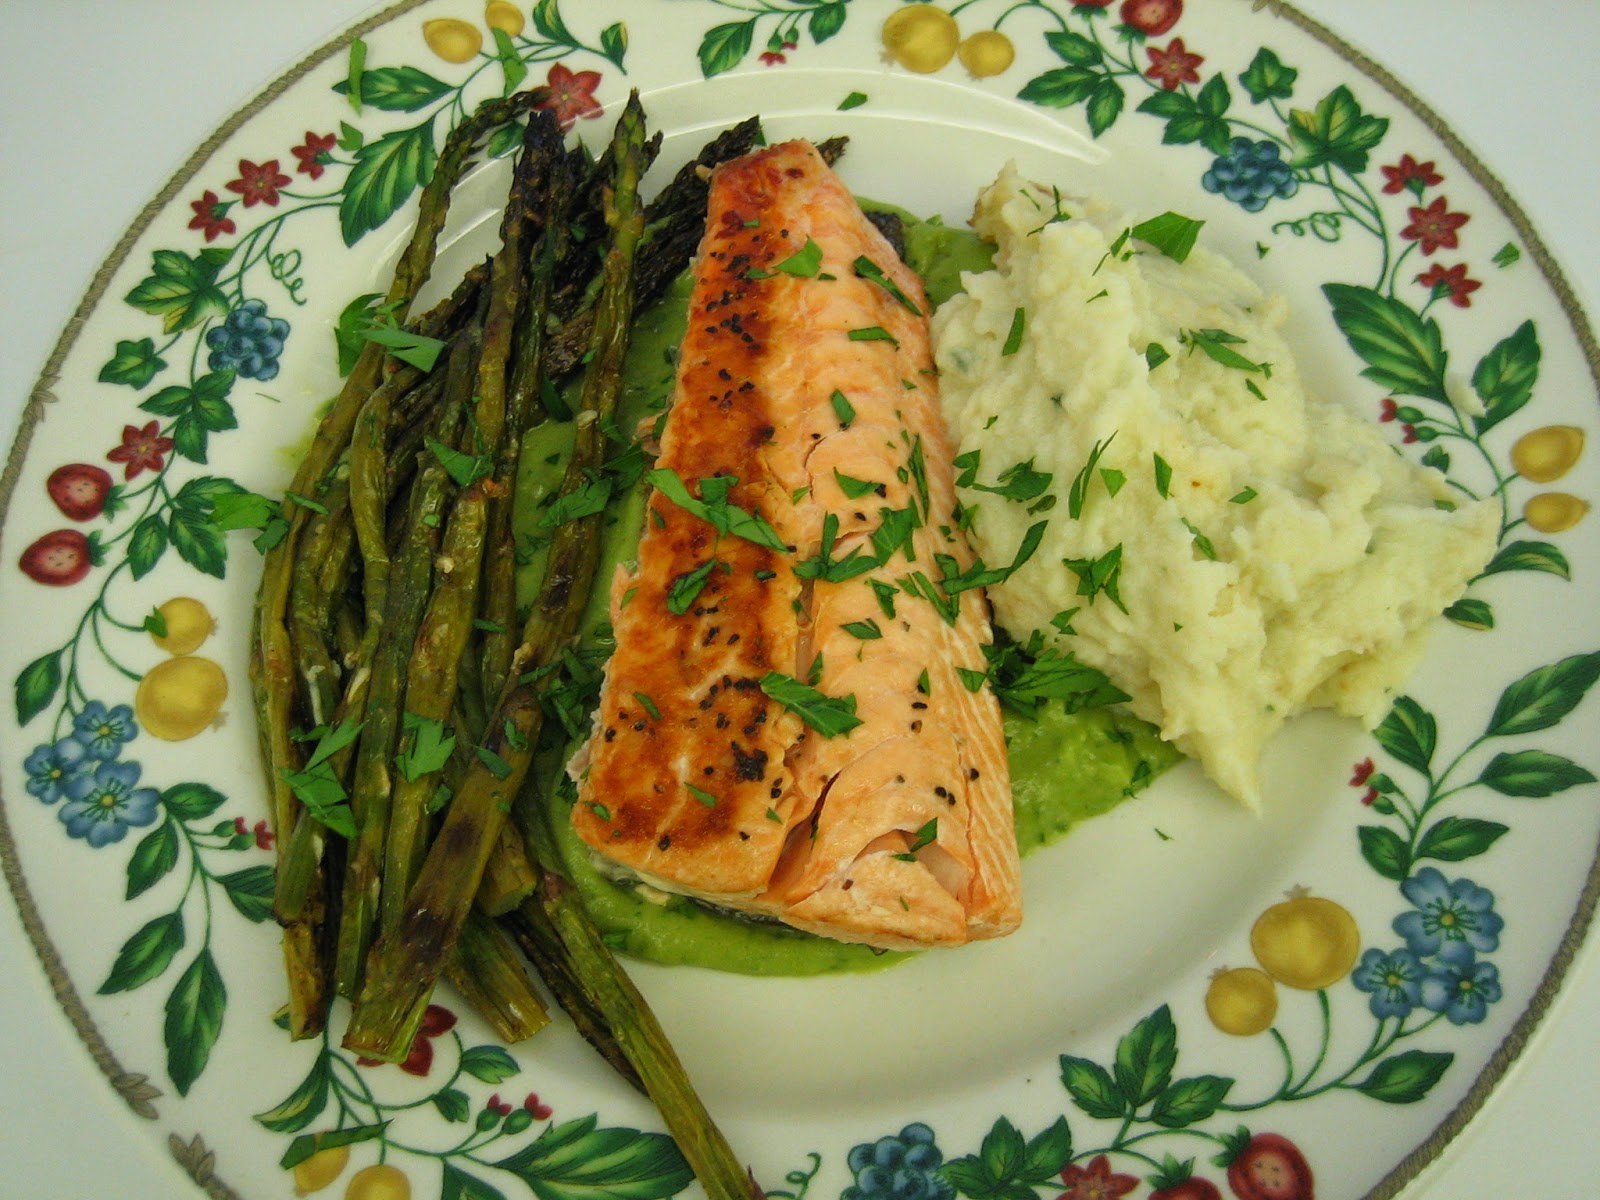
boneless skinless salmon fillets, preferably wild caught
·      salt and pepper to taste
·      1 pound organic asparagus, ends trimmed
·      1 lemon, thinly sliced, (plus additional wedges for garnish)
·      ½ cup organic butter, at room temperature
·      3 teaspoons Italian seasoning
·      3 teaspoons minced garlic
·      fresh thyme or parsley, for garnish (optional) 

Method

1.  Season salmon generously with salt and pepper on both sides. Arrange one salmon fillet and ¼ of the asparagus in the center of one 12 x 12 inch piece of foil. Repeat with remaining salmon and asparagus on 3 other pieces of foil. Slide lemon slices under the salmon and asparagus.
2.  In a small bowl mix butter, Italian seasoning, and garlic. Drop large dollops of the herb butter on top of the salmon and asparagus.
3.  Fold the foil tightly around the salmon and asparagus, being sure to seal the ends together tightly so the juices and butter doesn't run out while cooking. 
4. Bake at 400 degrees for 20 minutes, until asparagus is tender and salmon is flaky.
5.  Drizzle fresh lemon juice over the top and serve immediately.


Tuesday, September 6, 2016

Teryaki Chicken Wings


Here's a wonderful recipe that we literally lived on during the summer months.  This recipe is based on (translation: stolen from) my friend Kimberly Roberto's amazing recipe which can be found at her SMART MEALS blog on WordPress.  I have never tried one of Kim's recipes without it becoming a staple in our family meal plans.  She is amazing. And I know her recipes will never contribute to ill health or weight gain because they all conform to the Maximized Living Nutrition Plan. She is, after all, the co-author of the book!
The beautiful thing about this recipe is that it can be incorporated into a busy family life so easily. For instance, because there are only two of us (although Cliff eats enough of these wings to feed a gaggle of teenagers) I make the sauce, and then use half for one meal and refrigerate the other half for the next time we want to prepare the dish. The other benefit is the ease of the preparation.  Once the wings are in the oven, as you will see by the method below, you have all the time you need to organize all the other things you have to organize in an afternoon.
I hope you enjoy it as much as we do.

INGREDIENTS

  • 1/2 cup organic unsalted butter
  • 2 teaspoons spoonable stevia (or equivalent)
  • 1/2 cup red wine (optional, but highly recommended)
  • 1/2 cup liquid aminos or organic tamari
  • 1/4 cup fresh lemon juice
  • 2 teaspoons Dijon mustard
  • 1/8 to 1/4 cup hot sauce (adjust to your taste)
  • 1 teaspoon kosher or sea salt (Do not use table salt.  Unbelievably, it contains sugar!)
  • 1/4 teaspoon black pepper
  • 2 teaspoons garlic powder
  • 4 to 5 pounds of organic chicken wings (Adjust the amount of wings based on family size.)


METHOD


  • Melt all the ingredients (except the chicken) in a small sauce pan over medium heat.
  • Pour sauce over chicken wings in a large plastic bag to marinate for up to 6 hours.  If making a smaller batch of chicken wings, use half the sauce and refrigerate the other half for up to twenty-one days. 
  • Arrange chicken wings on a large rimmed baking sheet lined with parchment paper.
  • Bake wings at 350 degrees for 35 - 40 minutes.
  • Reduce heat to 275 degrees.  Remove the parchment paper and replace wings onto an oven rack over the rimmed baking sheet and continue to cook for up to 2 hours.  Lifting the wings onto the rack gives them room to groove, and we find the end product is more tender and extremely tasty.


Tuesday, October 20, 2015

Grainless Turkey Stuffing


Finding an organic turkey in your regular grocery store is getting easier all the time.  Stuffing the turkey seems to be the problem for most Advanced Plan eaters. I hope this recipe helps you, whether you've prepared multiple turkeys over the years, or if you've never been the chef for a festive holiday dinner before.

I know this looks like a lot of ingredients and a ton of preparation,  but it really is a matter of chop,  sauté,  season,  and stuff!  When you've done it once,  you'll be amazed at how easy it is.  Read the recipe through,  chop everything,  and have it all at your fingertips before you begin,  and you'll find it a breeze.
Enjoy.


INGREDIENTS

1 to 2 cups each (depending on the size of your turkey) :
Chopped organic celery
Chopped (preferably organic) cooking onions
2 cloves minced garlic (optional)

3 to 5 cups (again depending on the size of your turkey) bite sized cubed pieces of Grainless Rolls.  (I usually cut up 5 or 6 rolls.)

2 - 3 tablespoons grass fed butter
2 - 3 tablespoons olive oil

2 to 3 organic free run large or extra large eggs
1/2 cup grass fed butter

Seasonings to taste
Salt
Pepper
Sage
Parsley

(If you love thyme, add thyme.
If you love rosemary, add rosemary.)

PREPARATION

First, gently melt and then cool the 1/2 cup of butter and set it aside.

Gently melt the  2 - 3 tablespoons of butter and olive oil in your largest sauté pan.  Add the celery, onion and garlic, and lightly sauté over medium heat until they just begin to sweat.  (The celery will become a brighter green.)  Understand that the stuffing ingredients will fully cook when you roast your turkey,  so don't worry. . . Enjoy!

Add the cubed grainless rolls to the vegetable mixture and stir in to combine.

In a small bowl,  slightly whisk the eggs.  Add the eggs to the melted and cooled butter and whisk until combined. 

Pour the butter and egg mixture over the cubed bread and vegetable mixture.  Toss over low heat until everything is combined and the egg mixture is heated through.

Add your spices.  I use salt and pepper to taste, a healthy tablespoon full of dried sage,  and about the same amount of fresh,  finely chopped parsley.  (You could use dried. . . If you do,  use less.)  Again,  the amount you use is largely dependant on the size of your turkey and the amount of your stuffing. Stir to distribute the spices and TASTE.  Adjust seasoning to suit your taste.

At this point your stuffing is ready to go into the turkey.  If you are not roasting the turkey immediately,  DO NOT put it into the bird.  You can,  however,  make this stuffing the day or night before and refrigerate it until you stuff and roast the turkey on the big day.  Stuff both the neck cavity and the large inner cavity of a rinsed,  patted dry  organic turkey.

Happy Holidays!

Tuesday, May 19, 2015

FALL-OFF-THE-BONE DRY RUB CHICKEN WINGS


The incredible Kimberly Roberto has done it again. These wings are ridiculously easy to prepare and they turn out perfectly every time. What a great dish to take to an outdoor bar-b-que.  By the way, they are also delicious cold, (for breakfast. . . .yes, I did).
Enjoy.

4 pounds organic chicken wings
Dry Rub:
1 tablespoon granulated garlic
1 tablespoon cayenne pepper
1 tablespoon dry mustard
1 tablespoon freshly cracked black pepper
2 teaspoons ground cumin
Sauce:
2 tablespoons olive oil
4 tablespoons organic butter
2 tablespoons reserved dry rub
1 (12-ounce) bottle hot pepper sauce (check ingredients) (I like "Franks")
1 tablespoon apple cider vinegar
Combine all dry rub spices in a large bowl. Reserve 2 tablespoons of the mixture. Add the wings to bowl and mix thoroughly. Cover and refrigerate for at least an hour.
Preheat oven to 375 degrees F.
Line a baking sheet with parchment paper.  Lay all wings flat on the baking sheet and bake for an hour turning halfway through.
When the wings are almost done, melt the butter and then add other sauce ingredients.
When ready to serve, add the wings to a large serving bowl, pour sauce over the wings and toss.
Recipe modified from Guy Fieri 

Thursday, April 24, 2014

VEGAN CREAM OF CAULIFLOWER SOUP


Look who's Vegan all of a sudden!  Can't say when it began, but slowly over the long Winter, I have had less and less interest in eating meat for protein.  Before you start to worry about my nutritional needs, let me just say I have never felt better.  I am excited to share this creamy, delicious cauliflower soup for a few reasons.  1.) It is Vegan.  2.) No one in your family will ever suspect it is Vegan. 3.) It is delicious.
Enjoy.

Ingredients:


2 tablespoons olive oil

2 teaspoons chopped garlic (about 2 cloves - I used 4 cloves)

2 cups (200g) chopped leeks (white parts only, from 2 or 3 leeks)

Kosher or Sea salt

1 head cauliflower, chopped

7 cups vegetable broth (or water with a bit of added Kosher or Sea Salt)

1/4 cup (35g) raw unsalted cashews (available at Bulk Barn)


Directions:
In a large saucepan, heat the oil over medium heat and saute the garlic, leeks, and 1/4 teaspoon of salt for about 3 minutes, until the vegetables are soft. Add the cauliflower and saute for another minute. Add the vegetable broth (or water), increase the heat to high, and bring just to a boil. Reduce the heat to medium and simmer for about 30 minutes, until the cauliflower is completely tender. Stir the mix periodically and mash the cauliflower with a wooden spoon.
Remove the saucepan from the heat and allow the soup to cool slightly; stir in the nuts. Pour the soup into your blender in batches and puree on high for 1 to 2 minutes, until smooth and creamy. (Remember to remove the plastic cap in the blender top and cover the opening with a kitchen towel so steam can escape while you blend.) Return the soup to the saucepan and warm it over low heat. Taste to adjust seasoning.
Enjoy.

Thursday, July 18, 2013

Maximized Grainless Rolls


Maximized food has become a no-brainer for us.  I hear all kinds of protests about the "cost" of organic, grain-free, sugar-free cooking.  I can only reply that my health is worth paying for.  In fact, I can not think of anything that is more worthy of my money.  I will admit, though, that the idea of a grilled organic turkey burger without a bun has often left a little to be desired.  That's why I needed to share with anyone who doesn't already have the recipe. . .these Maximized Grainless Rolls are the bomb!  The recipe is from Kimberly Pease-Roberto,  co-author of The Maximized Living Nutrition Plan, so rest-assured, your health need never suffer from eating a burger again!
By the way, they freeze beautifully. . . .if they last that long.

Kimberly's great recipe goes like this:


1 1/2 cups almond flour
5 tablespoons psyllium husk powder
2 teaspoons aluminum free baking powder
1 teaspoon sea salt
2 tablespoons apple cider vinegar
2 organic eggs or 3 organic egg whites
1 cup boiling water
Mix all of the dry ingredients together.  Add the eggs and apple cider vinegar and mix well.  You will have a very stiff mixture on your hands.  Add the boiling water and continue to mix until well combined.  The mixture will then turn from a "soup" into a very sticky dough.  Split the mixture into 5 rolls.  You will want to “form” them into nicely shaped rolls and place them on a parchment lined baking sheet. I do this using a very large serving spoon (for rolls) and (for "buns") I place a ring on the parchment to make them "round." Bake for 50 minutes at 350 degrees.
These can be used for sandwiches, grass fed burgers, or own their own.
Here is the link for this and a plethora of other great recipes:
http://smartmeals.wordpress.com/category/breads-and-baked-goods/

Enjoy.

Saturday, June 22, 2013

Chicken With Artichokes and Mushrooms


Generally speaking, I find it necessary to slightly alter recipes I find online.  I "maximize" them, test them in my own kitchen, take pictures, and then post my results.  The following recipe is a rare and beautiful exception.  Chicken With Artichokes and Mushrooms is my new favourite recipe, but it comes directly from another blogger - the link is below.

The ingredients are simple.  In fact they are simpler than they appear.  The first time I made this dish, I had most of the ingredients on hand, but not all of the dried spices. Since the original blogger mentioned her own swap-outs, I decided to make the essential version without all the spices, and we were all thrilled with the results.  Recipes are like that - they are best when altered to suit your own time, ingredients, and taste! Go for it.

By the way, I am also using the original blogger's photo.  Ours did not last long enough to get a picture.

Here's the link. Chicken With Artichokes and Mushrooms

Enjoy.

Tuesday, May 28, 2013

20 MINUTE ORGANIC BLACK BEAN AND CHIPOTLE CHICKEN CHILI


This recipe takes NO MORE than 20 minutes to prepare.  It hardly needs to be written!  I have included easy to follow pictures with a few suggestions for amounts included, but honestly, the prep is insanely quick and easy. 
Enjoy. 


Add this (1 to 1 1/2 cups each) organic celery, carrot, and onion, to one pound of cooked organic ground chicken, turkey, or grass fed organic ground beef.  I often use 4 organic chicken burgers, and break them up in the bottom of the pot as they cook. See photos below.
Add organic beans and organic pasta sauce. (Pasta sauce should be from a glass jar.)The only spice I add is chipotle powder.  (If you  want to add other seasonings, feel free!  Just know that this chili has been called "EPIC CHILI" by some very discriminating eaters.)
Add water as desired to thin out the recipe.  I usually find this is not necessary.


I use organic chicken (or beef) "burgers" that I get in the frozen section at the organic market. You can put them in the bottom of the pot right from the freezer, and break them up, or get about 1 pound of ground organic chicken (or grass fed beef).  Either way, it will take you about 3 minutes to get your meat broken up as you see in the picture below.

 You're done!  Bring the chili to a boil, and then let the chili simmer until the vegetables are tender and the sauce thickens a little - this usually means about 10 to 15 minutes.

Monday, September 12, 2011

ALMOND FLOUR FLAX MEAL PIZZA DOUGH


FINALLY! A pizza dough that Maximized Living doctors and patients can prepare, eat, and savor without feeling guilty or bloated, or both!
Enjoy.

Ingredients:
1 ¼ cups Almond Flour
¼ cup ground flax meal
¼ to ½ tsp. kosher or sea salt
¼ tsp. aluminum free baking soda
1 egg, beaten with a whisk
1 Tbsp. extra virgin olive oil
1 tsp. seasoning of choice – Italian seasoning; roasted garlic powder (optional)

Preparation:
Mix all ingredients together until they form a ball.
Roll the “dough” into a ¼ inch pizza crust on a sheet pan with a silpat liner or piece of parchment paper.
(To make this easier, top the dough with another piece of parchment paper when you roll it out; then peel off the parchment paper when you have it the way you want it.)
Bake at 350 degrees for 10 to 15 minutes.
Remove from oven.
Top with your favourite "Maximized" pizza ingredients. Left-over "Maximized" ingredients are fine.
Return the pizza to the oven for another 10-15 minutes (this is a slow, lower heat pizza).

Tuesday, August 31, 2010

Asian Halibut Fish Cakes


This recipe is adapted from a salmon cake done by Martha's people at Everyday Food. I switched out the salmon for wild halibut and I knew it would be a new family favorite. The lovely mild ginger flavor makes this dish fragrant and delicious. I also learned a neat trick for making fish cakes without benefit of flour or corn meal. Egg is the binder; and the fish cakes are formed and then put into the freezer for about 30 minutes so they hold together when you put them into the frying pan. It works! We loved them.
Enjoy.

Ingredients:
1-1/2 pounds of wild halibut, chopped into small pieces approximately 1/2 inch square
2 Tablespoons grated fresh ginger (Tip: Peel fresh ginger with a spoon)
2 finely diced Shallots
1 egg
1 teaspoon Kosher or Sea Salt
1/4 teaspoon freshly cracked black pepper

Preparation:
Chop and mix all the ingredients together except the egg. Then slightly beat up the egg and stir it into the fish mixture until everything is coated with egg and the mixture is . . .well, it's gooey.

Line a baking sheet with parchment paper.

Using an ice cream scoop, divide the mixture into 6 to 8 portions. Place each portion in a scoop or circle shape on the lined baking sheet. Put the baking sheet into the freezer for 20 - 40 minutes, until the fish cakes hold together.

Heat a non-stick frying pan coated with a teaspoon or so of coconut oil. Add the semi-frozen fish cakes to the pan and let them cook for at least 5 minutes, until they are brown on one side and will hold together when you carefully flip them over to let them fry until they are done, approximately another 3 to 5 minutes.

I didn't try this when I made the test recipe, but when I make the next batch, I may try to make a double recipe, freeze the second half until it is safe to put them into a freezer bag or container, and save them for use another time.


Saturday, July 24, 2010

Summer Grilling Favorite Recipe LEMON CHILI CHICKEN


Wanted to re-post this family grilling favorite, in the hope that it will help you stay away from commercial bar-b-que sauces. These sauces are loaded with sugar - they can turn a perfectly healthy dinner into an over-the-top sugar fest! I really hope that once you try this recipe, you will use it year round - on the outdoor grill or on a ceramic-coated grill pan inside. (See GOOD FOOD for more notes about ceramic coated cookware.) You'll never be tempted by those nasty, sugar-laden bottled sauces again.
Enjoy.

Lemon Chili Chicken

Ingredients:

1/3 cup lemon juice
2 tablespoons olive oil
1 tablespoon chili powder
3 cloves garlic, minced
2 tablespoons mustard
1/2 teaspoon salt
1/8 teaspoon white pepper
4 organic, antibiotic free, free range, boneless, skinless chicken breasts

Preparation:
1) Combine all ingredients except chicken.
2) Pour 80% to 85% of the marinade into a heavy duty zip-lock bag. (Reserve the remainder of the marinade for basting the chicken during grilling.)
3) Add chicken; close bag and zip to seal. Place in bowl or baking dish and refrigerate for 2-6 hours.
4) When ready to cook, discard the marinade left in the zip-lock bag. Prepare and preheat grill. Cook chicken for 12-18 minutes, turning once and brushing frequently with reserved marinade, until chicken is thoroughly cooked.

Wednesday, June 9, 2010

GRILLED STEAK WITH CHIMICHURRI SAUCE


Outdoor grilling season makes me so happy. The addition of the chimichurri sauce is really fun, especially if you are growing flat leaf parsley. The sauce should keep in the refrigerator for a few days, but it probably won't last that long.
Enjoy.

Ingredients:¾ cup finely chopped fresh Italian (flat leaf) parsley
½ cup olive oil
3 tablespoons fresh lemon juice
2 ½ tablespoons finely chopped garlic
2 ½ teaspoons dried crushed red pepper (see note)

2 grass‐fed beef steaks, your favorite cut, 4 to 6 ounces each (about 1 inch thick)

Note: Use any kind of dried hot spice you like for the crushed red pepper. For instance, I am a fan of ground chipotle pepper. Also, when it comes to adding spices, start slowly, taste, and then decide if you want to add more.

Preparation:1) Place all ingredients except the beef in a food processor. Pulse until a smooth sauce is achieved.
2) Refrigerate if time permits. (Can be made 1 day ahead.) Bring to room temperature before using.
3) Sprinkle both sides of steaks with sea salt and pepper.
4) Place steaks on barbeque grill and cook until desired doneness, about 3 minutes per side for medium‐rare.
See our notes about cookware here, or in GOOD FOOD if you are cooking on an indoor grill pan.
5) Once the steaks are cooked, let them rest off the heat for at least 5 minutes before slicing and serving them. Slice steaks crosswise (across the grain of the meat) and arrange on a platter. Spoon chimichurri sauce over the steaks and serve.

Monday, May 31, 2010

Advanced Plan Pizza- What?!?


What?!?

I know. When I found this recipe (at a website called "Tropical Traditions"), I was extremely skeptical. The second time I tested the recipe, I made two batches, because I knew we would snack the first one away (as we did the original test) before a whole pizza could be made. Honestly, we love this recipe as a kind of a cheese bread and as a pizza crust.
Enjoy.

Ingredients:
2 cups whole milk organic (raw is preferable) mozzarella cheese, shredded
2 large organic eggs
2 tablespoons flax meal
2 tablespoons organic coconut flour
1/2 teaspoon aluminum free baking powder

Preparation:Preheat oven to 350 degrees F. Cut 2 pieces of parchment paper to line two baking sheets.

Mix cheese, eggs, flax meal, coconut flour, and baking powder together until a sticky wet dough is formed. Spread with a spatula to 1/4 inch thickness on a baking sheet lined with one piece of parchment paper. I usually cover it with another piece of parchment, once I have it shaped into a circle, and roll it out with a rolling pin a bit more, because it will "rise" a little while cooking, and I want it to cover as much surface area as possible, and remain thin like a pizza crust.

Bake for 30 minutes in preheated oven. Halfway through the baking process, flip crust over by lifting it from the baking sheet, flipping it over onto the second parchment lined baking sheet and peeling the old paper off. This is easier than it sounds. Return to oven to finish baking for the remaining 15 minutes.


Remove from oven, and flip over again (onto a cooling rack) for cooling. Once crust is cooled, top with Maximized toppings (we used some cold diced organic chicken and tiny broccoli florets) and, yes, more cheese. (I have also used home made bruschetta topped with the cheese, and it was wonderful.)

Place crust with toppings under the broiler, about 4 to 6 inches from heating element, on high heat, for a minute or two until cheese is melted and bubbly. I do this on yet another piece of parchment paper, but watch it carefully because the broiler will burn the parchment paper if you leave it too long. My parchment paper has been brown, but not burnt, by the time I remove the pizza from under the broiler.


Makes 2-4 servings. (I suggest you make two.)

Tuesday, February 16, 2010

Chipotle Lime Chicken


Chipotle is a wonderful flavor. It is not only hot, but has a smokey element to its taste. I assume it comes in mild, medium, and hot versions. I definitely got the hot variety. When you make the marinade for this chicken, taste your chipotle chili pepper. Depending on the heat of your spice, adjust the amount used in the recipe.

I used an indoor grill pan and the results were wonderful, but this would make a wonderful summer bar-b-que staple as well.

Enjoy.

Ingredients:
1/3 cup freshly squeezed lime juice
2 tablespoons extra virgin olive oil
1/2 to 1 tablespoon chipotle chili powder
3 cloves garlic, minced
2 tablespoons (preferably organic) mustard, any style as long as it has no sugar
1/2 teaspoon salt
1/8 teaspoon white pepper (optional)
4 organic, antibiotic free, free range, boneless, skinless chicken breasts or thighs

Preparation:

1) Combine all ingredients except chicken.
2) Pour 80% to 85% of the marinade into a heavy duty zip-lock bag. (Reserve the remainder of the marinade for basting the chicken during grilling.)
3) Add chicken; close bag and zip to close. Place in bowl or baking dish and refrigerate for 2-6 hours.
4) When ready to cook, discard the marinade left in the zip-lock bag. Prepare and preheat grill. Cook chicken for 12-17 minutes, turning once and brushing frequently with reserved marinade, until chicken is thoroughly cooked.

Serve with guacamole, salsa, tomatoes, and possibly a dollop of organic sour cream. Depending on the heat intensity of your chipotle chili powder, you will need the guacamole and sour cream to cool your mouth!

Wednesday, February 3, 2010

CRUSTLESS BROCCOLI QUICHES


Elegant, healthy, romantic, and delicious! What more could a valentine ask for?
Enjoy.

Ingredients:Organic Butter, for ramekins
Kosher or Sea Salt
1 cup Broccoli florets, very lightly steamed and cooled
6 large organic, free range eggs
½ cup organic half-and-half (or ¼ cup each organic milk and cream)
¼ teaspoon freshly ground black pepper
1/8 teaspoon ground nutmeg (freshly grated is best)
¾ cup shredded organic (hopefully raw) cheddar cheese (3 ounces)


Preparation:
Preheat oven to 350 degrees.
Butter 4 8-ounce ramekins (or a 9-inch pie dish); set aside
In a large bowl, whisk together eggs, half-and-half, and seasonings. Stir in broccoli and cheese.
Place ramekins on a rimmed baking sheet. Ladle quiche mixture into ramekins, dividing evenly. Bake until golden brown, 35 to 40 minutes.
Serve immediately -the beautifully puffed quiches will fall somewhat as they cool.

Monday, February 1, 2010

Valentine's Day Dinner Menus


My friend, Joanne, had the idea to make up a "Maximized Valentine's Day Dinner Menu." I was immediately inspired, and couldn't believe I hadn't thought of it myself. Here are some ideas for a three course menu - all mix and match of course, and all delicious. For each suggested recipe, remember to use quality ingredients - organic if at all possible in the case of the fruits and vegetables, and free range organic, or wild caught in the case of the meats and fish. The recipes can all be found in GOOD FOOD, MAXIMIZED LIVING NUTRITION PLAN, or here within the pages of this Blog. Enjoy.
Appetizer Choices:
Spinach Salad with fennel, pine nuts, sliced strawberries, and Roasted Shallot Vinaigrette
Leek and White Asparagus Soup
Roasted Cauliflower, Garlic, and Leek Soup

Main Course Choices:Crust-less Broccoli Quiche with grilled Asparagus
Lemon Chicken on a Bed of Pureed Cauliflower, with Mediterranean Zucchini Boats
Pan Seared Salmon with Avocado Remoulade and Green Beans
Grilled grass-fed steak with Chimichurri Sauce and mixed vegetables

Dessert Choices:
Strawberry Shortcake
Raspberry Frozen Yogurt
Chocolate Pecan Torte with Strawberry Sauce or Whipped Cream

Saturday, January 30, 2010

FISH FRY DINNER


With very minor changes, you can enjoy fish that your children won’t feed to the cat.
Enjoy.

Ingredients:1 to 2 pounds of wild caught fresh or frozen fish of your choice, such as:
Flounder
Grouper
Red Snapper
Amberjack
White fish of all varieties
Note: Wild caught frozen fish, thawed, is perfectly acceptable, and very affordable.
3 to 4 tablespoons of coconut flour
Salt, pepper, cayenne, lemon pepper – choose your favorite seasonings
2 to 3 tablespoons coconut oil
Lemon wedges (optional)


Preparation:1) When the rest of your dinner is prepared and your table is set, heat the coconut oil in a large skillet. (This process takes very little time, but requires your full attention.)
2) Lightly season your fish, and then dust or dredge in the coconut flour.
3) Sauté the fish in coconut oil over medium high heat for approximately 3 to 4 minutes per side, depending on the thickness of your fish, until the coating is golden brown and the fish is cooked, and flakes to the touch.
4) Garnish with lemon wedges. Serve immediately.

Important Note: See the blog about cookware.

Friday, January 8, 2010

PAN SEARED SALMON WITH AVOCADO REMOULADE


This time of year, my nails, hair, and skin can become so dry. What a great excuse to eat one of the healthiest foods on the planet - avocado. The good fats supplied by this gorgeous fruit can not be duplicated. This avocado remoulade is a sort of "mayonnaise" without all the un-pronounce-able ingredients and trans fats you find in a mayo jar. The taste is absolutely delightful. It can be used in a thousand ways, as long as you eat it all up once you prepare it. (Avocadoes do turn brown - if they last that long.)
Ingredients:• 2 large avocados, cut and peeled
• 3 tablespoons freshly squeezed lime juice (you can substitute lemon juice)
• 3‐4 tablespoons olive oil
• 1 tablespoon minced shallots or green onion
• 1 tablespoon minced fresh parsley
• 1 teaspoon Dijon mustard or to taste (no sugar – check the label)
• Salt and pepper to taste
• 1 1/2 to 2 pounds of wild caught salmon fillets
• Coconut Oil
Preparation:1) Put avocado pieces and lime juice into a food processor or blender and pulse until blended.
2) Slowly add olive oil, pulsing, until you reach desired consistency of sauce.
3) Add minced shallots (or green onions) and parsley, pulse just until combined.
4) Remove to a bowl, add mustard, salt and pepper to taste.
5) Coat the bottom of a sauté pan with coconut oil. (Earth Chef or Green Pan Cookware is the only non‐stick cookware I recommend. It is available at Zellers in Canada or Target in the United States.)
6) Season both sides of the salmon fillets with salt and pepper.
7) Carefully lay the salmon into the pan, skin side down first.
8) Cook the salmon until it is done, and flakes easily when pressed with a fork (approximately 4 to 6 minutes per side).
9) Serve salmon with avocado remoulade sauce.
Serves 4

Saturday, January 2, 2010

Baked Wild Halibut Steaks


An Italian-style vegetable and feta cheese topping is the perfect enhancement to this delicious, light, baked halibut. The herbs and tomatoes will make you think it's summer!
Enjoy.

Ingredients:1 teaspoon extra virgin olive oil
1 cup diced zucchini
1/2 cup minced onion
1 clove garlic, peeled and minced
2 cups diced fresh tomatoes
2 tablespoons chopped fresh basil
1/4 teaspoon salt
1/4 teaspoon ground black pepper
4 (6 ounce) wild caught halibut steaks
1/3 cup crumbled imported Greek feta cheese

Directions:1. Preheat oven to 450 degrees F. Lightly grease a shallow baking dish with extra virgin olive oil.
2. Heat the extra virgin olive oil in a medium saucepan over medium heat and stir in zucchini, onion, and garlic. Cook and stir 5 minutes or until tender. Remove saucepan from heat and mix in tomatoes, basil, salt, and pepper.
3. Arrange halibut steaks in a single layer in the prepared baking dish. Spoon equal amounts of the zucchini mixture over each steak. Top with feta cheese.
4. Bake 15 minutes in the preheated oven, or until fish is easily flaked with a fork.

Friday, January 1, 2010

Chicken Savoy


Want a chicken dinner recipe that you can leave in the oven while you prepare the rest of the meal? This chicken is juicy and delectable. Anyone can prepare it, and everyone will enjoy it.

Happy New Year, Everybody.
CHICKEN SAVOY

Ingredients:

4 Organic free range boneless, skin-on or skinless chicken breasts
1/8 cup extra virgin olive oil
2/3 cup water with 1 Tablespoon kosher salt
2 or 3 cloves of garlic, minced or grated
½ to 1 teaspoon dried oregano or basil (your preference)
Salt and pepper to taste
¼ cup freshly grated, real, imported, Italian Romano (or Parmesan) cheese
3 Tablespoons Balsamic Vinegar (optional)

Note: It is important that you choose your cheese wisely. Raw is best. Failing that, I have found that good quality imported cheeses from Italy and Greece are the next best thing. The problem with other cheeses is that they come from our poor, North-American, corn-fed, feed-lot cows. We don't want to eat these cheeses.
Preparation:
Preheat oven to 450 degrees

1.) Place the chicken breasts in a 9 x 13 or other shallow baking dish.
2.) Cover the chicken with a mixture made of the water, kosher salt, and olive oil.
3.) Grate or mince the garlic and sprinkle it on the chicken breasts.
4.) Sprinkle the salt, pepper, and other seasoning over the chicken.
5.) Sprinkle the Romano cheese over the chicken.
6.) Bake at 450 degrees for 20 to 30 minutes, or until chicken is cooked through.
7.) Remove the dish from the oven, and pour off the excess fluid, leaving the chicken in the baking dish.
8.) Drizzle with the Balsamic Vinegar (if using) and serve.